Its been crazy busy here I’m finally catching up on some writing and relaxing. In my post a little pickle I said Id try do up a recipe for my mushroom burgers. So here it is, well kind of. Ev…
Its been crazy busy here I’m finally catching up on some writing and relaxing. In my post a little pickle I said Id try do up a recipe for my mushroom burgers. So here it is, well kind of. Everything is an approximate amount of the ingredients. For me I throw in things that I think go together and hope for the best. Lets get going ……
What I do…
Using a food processor chop the following
Mushrooms 400g approx
1 Onion
1 can of chickpeas
1 can of mixed beans or what ever beans you have handy…. maybe not baked beans but in an emergency I guess you could wash off the sauce.
Fry mushrooms and onions on a low heat till the juice is released and then cooked back into them ( this retains flavour and stop your burgers becoming soggy)
Allow to cool.
Mix all the ingredients in a bowl
Add some cumin powder a decent amount of salt pepper and what ever takes your fancy. Some fresh chilli would add a nice kick.
Mix in one egg and enough bread crumbs to combine the mixture but not too many, a dry burger is a crumbly burgers and no one wants that.
Line a freezer suitable tray with parchment. : TIP use some butter on the corners and center of the try to stop the parchment from rolling up and falling off the tray.
Make your burgers into rounds to fit your burger buns. They wont shrink like a beef burger but are just as tasty.
Place another sheet of parchment on top of the burgers and pat gently.
Place into the freezer and leave over night.
I like to bag the burgers in small individual bags which are then placed into one larger bag keeping them together.
Cook burgers from FROZEN it stops them falling apart, They are amazing done on the barbecue or on a griddle pan But a regular pan with a dash of olive oil or in the oven is great too.
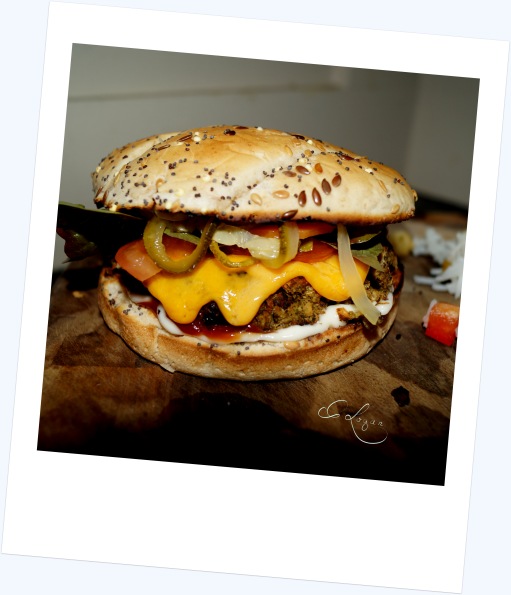
Build your burger ….
I like to use gourmet buns toasted. Next its time to get layering.
Layer One
use some kind of sauce traditional mayonnaise and ketchup is good or mix it up with a little greek yoghurt with some cucumber
Layer Two
next is the burger
Layer Three
Then get your favourite cheese slice and put on top stick under the grill to make all gooey and delicious. Blue cheese is great but anything will do
Layer Four Five Six………. and seven
top with some onions, lettuce, tomato …… and crisp Pickled courgettes .
Eat and Enjoy The messier the better!!!
Hope you guys give this a go and can follow my vague guidelines.
hey guys. Hope you enjoy todays post. More practical than previous ones. Hope you find it interesting. Dont be afraid to leave a comment or any hints and tips. Im only learning so it’s all appricated.
Todays task was freezing veg. My two remaining cabbage plants burst so something had to be done with them. I picked all the peas during the week and some of the turnips were getting far too big. A few months back I done a trial run of blanching and freezing veg, mainly to see if they were still eddiable. They were perfect, No one could tell the difference and the best part is having your veg ready prepared. It makes dinner soooooo much quicker.
Preparing the veg for blanching and freezing takes longer than expected. I suggest to do this on a day where you have no errands to run or places to be. Also start with a clean kitchen and be organised, have the bags labeled and plenty of bowls for veg it will take up more space than you think especially the cabbage.
Equipment
Large stock pot
Lots of bowls
Freezer bags, With name of veg and date of preparation on the front
Strainer
Sieve
Good sharp knife
A quick brief on Blanching.
Basically its boiling veg for a short amount of time, then cooling rapidly. The time depends on the vegetable to be blanched but I’ll fill in you in on that as we go along. Vegetables have naturally occurring enzymes that help them to grow and ripen. These enzymes continue to work even after the vegetables have been harvested. Freezing slows down the enzymes but does not kill them. That’s where blanching comes in. Failing to kill these enzymes will cause colour, flavor, texture and nutrient loss. Enough of the science. Keep reading for info on blanching cabbage peas and turnip.
Turnip
I used some delicious firm turnips. I had plenty to choose from so pulled anything getting too big. I topped tailed and washed them. Next carefully, and wasting as little flesh as possible I cut off the skin. I decided to do two batches. Batch one would be cubed, blanched and frozen. Batch two would be cooked mashed and frozen. After what felt like forever they were pealed cleaned up and cubed. Batch one was kept as close to the same size as possible, batch two was being cooked so no need to be sos fussy.
Method – Blanching
Wash
Peal
Dice in about 1/2 inch cubes
Have large stock pot of boiling water ready
Take no more than 500g of turnips
Blanch in boiling water for 2 minutes
Remove using the sieve
Add to strainer
Run under cold water to halt cooking process
Put into a bowl and set aside
Let water come back to the boil
Continue untill finished all turnip.
Add desired amount of turnip to labels zip lock bag. Dinner portions are probably best
lay flat and freeze. ( laying flat allows them to be stood up and stacked like books at a later stage)
Cook as normal, from frozen
Method – Cooking
Wash
Peal
Dice
Steam or boil
Leave aside to cool
Fill into bags as before.
Lay flat and freeze
Cook from frozen, heat in a pot. Add butter some salt and pepper, Enjoy
turnips
Cabbage
My cabbages like my courgettes and caterpillars are on steroids. They got too big/tight and burst right open! I didn’t want to waste them so I pulled them and got preparing. They were a little tricky. Firstly remove all the outer leaves,any slugs hidden among the leaves and cut in half . Trim the edges of the cabbage where it burst carefully cut out the heart ( don’t so this if freezing the cabbage in quarters it will fall apart) and remove and imperfect leaves. I sliced mine really fine but its all about personal preference.
Method Blanching
Remove leaves and any slimy visitors
Cut out hearts
Slice
Add to colander a little at a time and throughly wash
Add no more than 500g to a large stock pot of boiling water
Boil/Blanch for 1.5 minutes
Remove from the heat
Take out as much as possible using the sieve
Add to colander rinse untill cool
Put into a bowl and set aside
Bring pot back to the boil and continue blanching etc till cabbage has been used.
Add to labeled bags
Lay flat and freeze
To eat cook from frozen
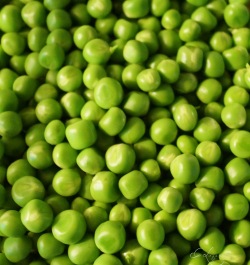
Peas
My pea plants were starting to die off so with some help I got picking. We didnt have as many as I would have liked. Partially due to the calves obliterating the first batch and secondly two whole rows failing to grow. Next year will be better. After carefully removing the peas I had about half a bowl full. The method for blanching peas is a little different from the others. Bring water to a rolling boil, add peas wait till water returns to the boil and boil for 1.5 minutes. Pour into colander rinse untill cool. Put into a labeled freezer bag lay flat and freeze.
Method Blanching
Pick
Depod
Rinse
Add to boiling water make sure the peas have plenty of space to move
Wait till water returns to the boil
Count 1.5 mins
Remove from the heat
Rinse to cool
Add to labeled bag
Freeze
To eat cook from frozen. Boil or steam them and enjoy.
Apologies if this post is a little boring. Blanching veg isn’t exactly a ”rockin” activity. I’m delighted to have the space to store all my frozen veg. It means I wont waste anything and ill be able to enjoy my lovely garden veg all year round. Next time your local supermarket is having a sale why not buy some extra veg and freeze it, a couple of well spent hours will save you money in the long run. Having a freezer full of ready prepared veg makes meal times a doddle. No washing, chopping and peeling seriously who could complain.
I hope you have enjoyed this post and found it informative. Untill next time ……..
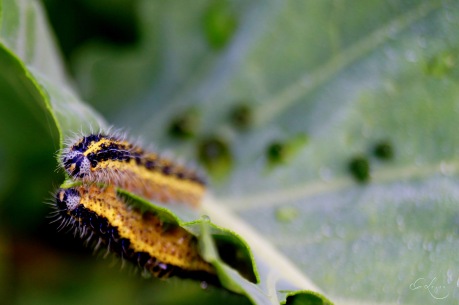
Welcome back. I hope you Enjoy today’s post all about my caterpillar problem.
There’s nothing that says hello summer like pretty dainty and delicate butterflies , except of course when they are reproducing on your cabbage, or in my case my cauliflower and broccoli.
As a kid we loved to look for caterpillars. Nothing could top a Hairy Molly but a regular caterpillar was always good too. On finding a striped yellow and black fellow while walking in a local wood, I insisted on taking him home. kept it in a plastic tub and fed it all sorts of leaves. Exciting as that was nothing could top the fact that when fed purple leaves it proceeded to poop purple poop! It looked like tiny purple square bales. At seven hilarity ensued . Amazing enough the purple leaves didn’t do it any imitate harm. He/She spun a cocoon but sadly never emerged.
This being my first year with a garden I didn’t know what to expect in the butterfly , caterpillar department. My cauliflower was the first to be attacked although not badly and nothing like the way my broccoli was savaged. Not wanting to kill anything and trying to keep my garden organic, pesticides were totally out of question. My daily caterpillar ritual started with muttering about where could so many have come from and how much they munched through over night! then id proceed to pick them off and unmercifully fling them over the fence. They survived, right!
caterpillar army
After being advice by a neighbour, I mixed washing up liquid with water and sprayed they leaves. After picking off the caterpillars and sending them first class over the fence. The caterpillars soon disappeared from the leaves and my mind.
UNTILL……
……….They got to my broccoli. I started my ritual, mutter mutter mutter, pick pick pick, fling fling fling, bon voyage!. I made up a new bottle of soapy water and got spraying. This time though it didn’t work. Caterpillars, on steroids like my courgettes surely not!
Then something dawned on me. The first bottle of spray I made contained the good stuff, Fairy Liquid. The second was made using a supermarket brand. Intrigued I bought some more Fairy and gave it a go. BINGO! Christina 1 Caterpillars 0. There was one or two little guys that I didn’t fling. They got sprayed and the next day they were dead and all shriveled up. Lesson learned
Fun Facts
The Cabbage White butterfly is responsible for the caterpillars who reside on cabbage etc
There is a Large Cabbage White and a Small Cabbage White
Small Cabbage White caterpillars are bright green and less damaging
Large ones are black and yellow
They produce two broods a year and three in a particularly good summer.
Caterpillars build up mustard oil in their bodies as a natural defense method
Alternative ways to prevent and remove caterpillars
Use Butterfly netting early to prevent eggs being laid
Put bird feeders nearby to attract birds who enjoy caterpillars such as, house sparrows, goldfinches and skylarks
Use neem oil spray to deter caterpillars
Pick off and feed to chickens
Companion Planting
Plant Nasturtiums in between veg. caterpillars love them so will hopefully migrate to the flowers and leave your brassicas alone
Plant mug wort, sage, thyme rosemary or peppermint. These strong smelling herbs are a deterrent to caterpillars.
Plan For Next Year
Use some netting
Companion plant
Plant small patch of greens for butterflies to lay eggs on and for caterpillars to freely munch
Find some flowers enjoyed by other butterflies plant these too
Watch the new butterflies in my garden.
Hope you enjoyed this post and that it wasn’t too long. Until next time …….
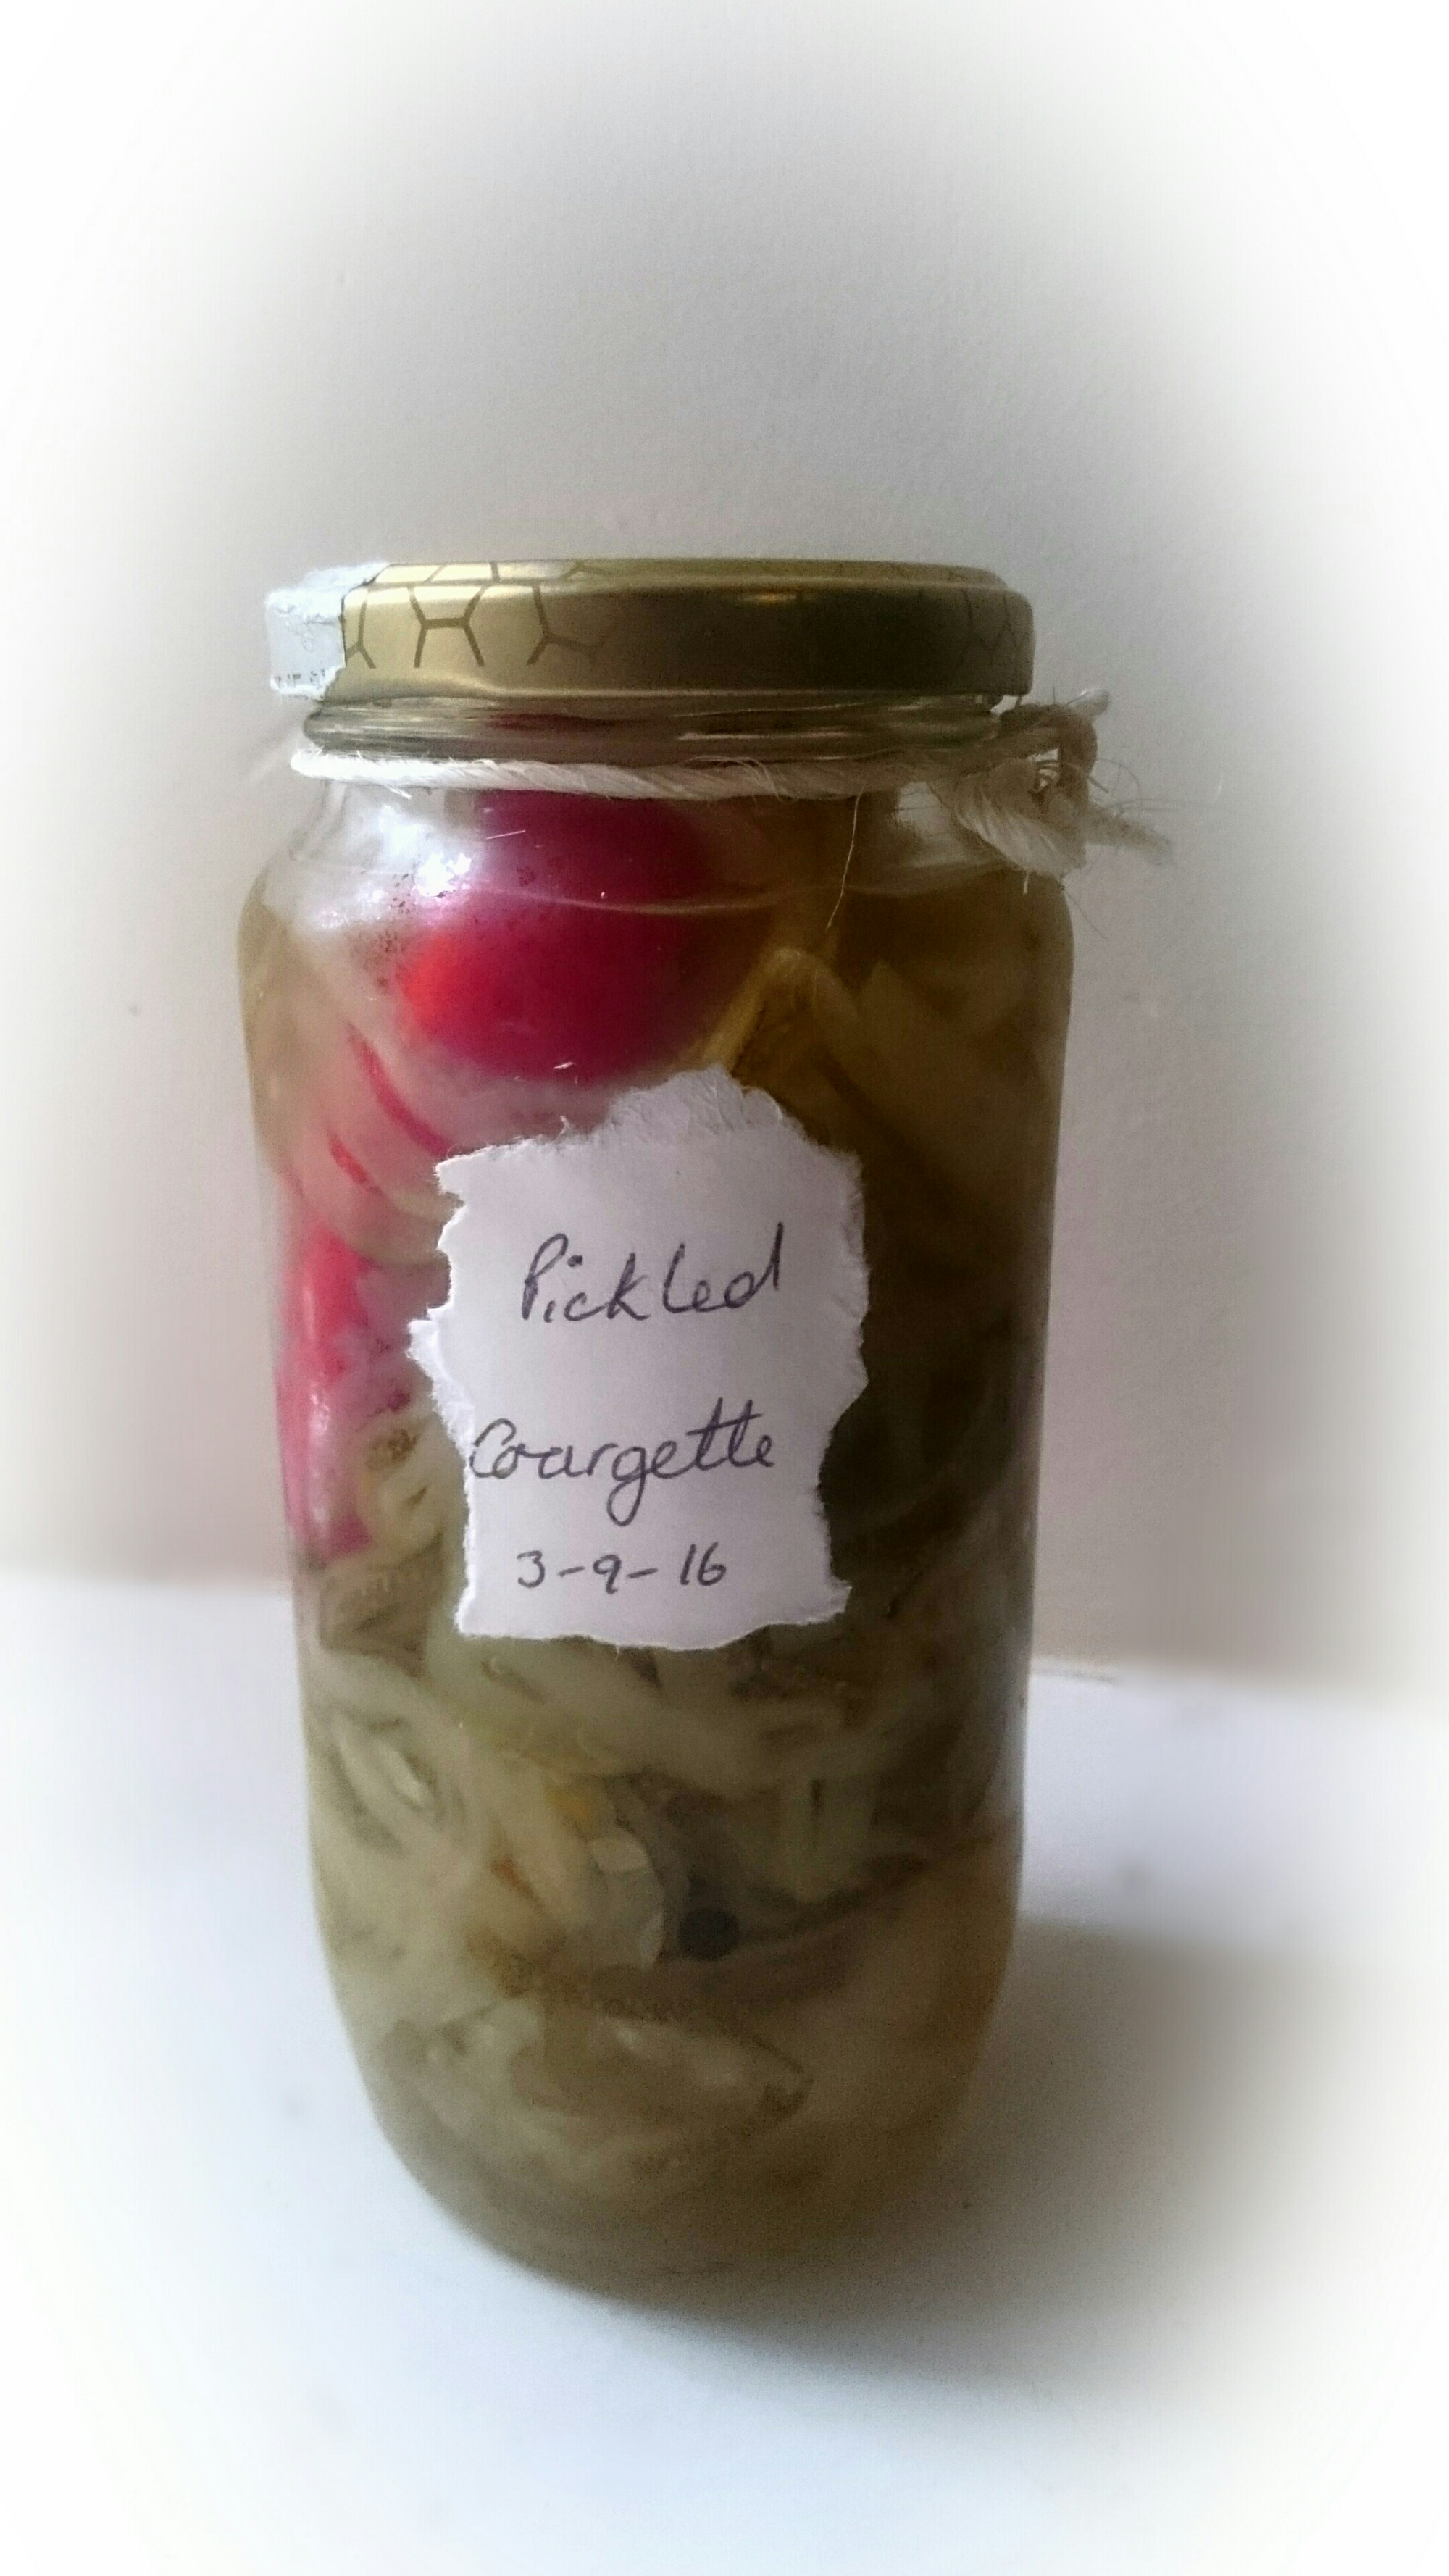
So on Saturday before I started my pickle I was bought a spiraliser. Having no patients and being all excited I “spiralised” two courgettes and a carrot (Ii didn’t have anything else suitable). Its a great gadget and will be often used . Any way I had loads of courgette with no use. After processing my planned jars I had some pickling liquid left over. Not wanting to let it go to waste I quickly cleaned and sterilised another jar. Filled it with my spiralised carrot and courgette and topped it off with the vinegar. I decided to put in a chilli pepper, I stabbed some holes into it and stuffed it into the jar, I didn’t think it would add any flavored but it did look nice . I didn’t bother processing because the courgette was so fine I figured it would go mushy. I just stuck it into the fridge.
Last night I decided to crack it open. It smelled quite similar to any store bought pickle. Feeling pretty proud I dived in. The flavours were awesome tangy slightly sweet and beautifully crunchy…..Then came the spice! Maybe the whole chilli was a bit much but still really good.
I think they would be fab on a burger. That’s my next mission. I make veggie mushroom, chick pea and bean burgers for the bbq. I think some pickled courgette, blue cheese and lettuce would make them amazing!
I’ll keep you posted. My recipe for the burgers is just a bit of this and a bit of that but I’ll put it into words as much as possible.
Welcome back to you guys and hello to any newbies. Ok so my courgettes are on steroids. They just keep coming. I’ve annoyed every neighbour friend and acquaintance trying to get rid of them. I needed some way of preservation. Pickling looked simple. Just bang a few ingredients together, cook them in some vinegar and hey presto. Simple right,Wrong. Every page and recipe I looked at contradicted the last.
Basically I found that there are two types. One that uses all vinegar, sugar and spices that is kept in the fridge and must be consumed with in three months. The other uses water vinegar and sugar for preservation and can last perfectly for a year and beyond. Each has a different process but more of that later.
Although I wanted a pickle that would pretty much last indefinitely I decided to try a ”refrigerator” one just for fun. It was pretty simple. Here’s the recipe I used. Crunchy Courgette Pickle recipe The crunch was fab but for me the vinegar was too strong and I didn’t particularly like the mustard flavour but that’s just my preference. Don’t let it stop you trying it.
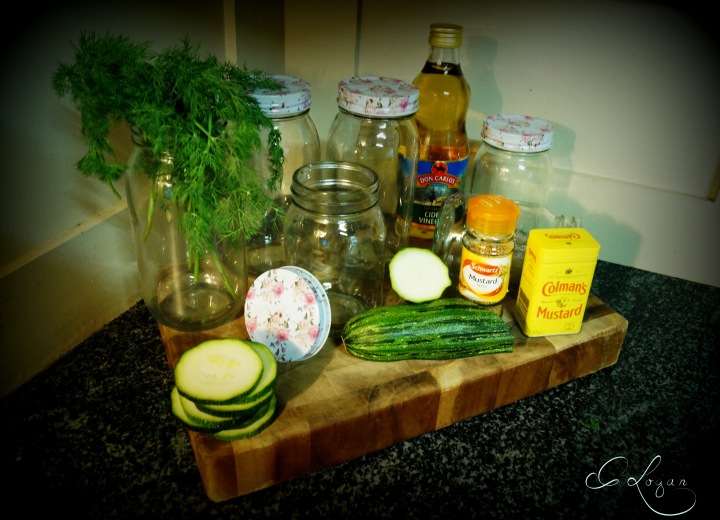
All ready to get Pickling.
Now for the fun part. After hours of research I discovered that the best way to pickle and preserve my courgettes with a crunch and a long shelf life was to can them. It seems to be a very popular method in the USA and Canada but not so much here in Ireland. I was accepted into a Facebook group called country farm girl. They are amazing helpful people. I have zero idea why its called canning because you use jars, just one of those things I guess. The difference in this way of pickling is processing the jars, which involves boiling the full jars after they’ve been filled. I don’t have a fancy canner, matching jars or any idea what i was getting myself in for. Not wanting to use my new pretty jars incase I exploded them I hunted down some regular jam jars, a salsa jar and some other random jars from around the house.
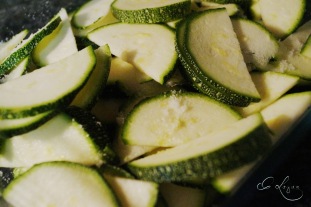
Firstly I sliced and salted my courgettes. next up was preparing a Large stock pot by putting a tea towel in the bottom filling with water and Bringing to the boil. The towel is to prevent the jars from cracking by hitting off the bottom.
Next up was making my pickling liquid. I used water, sugar, vinegar onion and a tiny amount of mustard seeds. While this was coming to the boil I prepared my jars.
They were washed with hot soapy water, put into the oven and heated to kill any bugs that might be hanging around. The lids were put into a pot and were boiled until required.
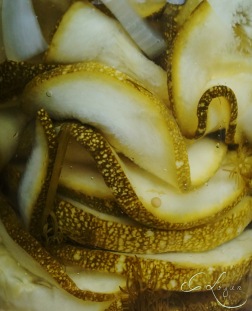
Next up I placed a folded bath towel on the counter, Removed my jars VERY carefully from the oven and filled them with my beautiful floppy courgettes and aromatic Dill .
waiting to be pickled
Carefully I ladled my pickling liquid into the jars, I spilled loads and found it difficult to get all the onions in. Using a wooden utensil stir the contents to remove any air bubbles. A head space of half an inch needs to be left in the jars. Wipe the rims and put on the lids. By now your stock pot should be boiling, carefully place your jars into the water. Making sure that the water is at least an inch from the lid and that they don’t clink off each other. I wanted to retain the crispness of my courgettes so I processed mine for only eight minutes. After eight minute carefully remove them from the water and place upside down over night.
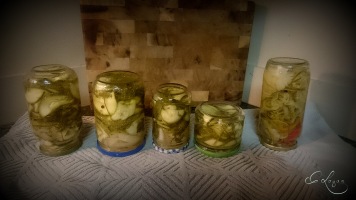
The next day check your jars. If the lids have ”popped” then the processing has been successful. If some lids can still be pushed the processing didn’t work. With courgettes you can reprocess but repeating will result in a softer pickle. After processing you will see the colour of the courgettes has changed from an emerald green to an olive green.
Now your pickled courgettes are ready to cure. Its really hard to wait and not open them! By using this method they will happily last a year and beyond. Keep them in a cool dry spot away from bright lights, wait for them to cure pop that lid and ENJOY.
Things I learned
Be organised
Its best to use similar sized jars ( easier for processing )
For a crunchy pickle process for 8 minutes
use plenty of salt
Pretty much anything can be pickled
If possible purchase proper canning jars and lids ( my next investment )
The long lasting pickle contains water, the refrigerator one does not.
Don’t use metal utensils the wrong type can taint the flavor, best to stick to wood.
Don’t smell the boiling vinegar.
Keep windows open and doors to other rooms closed. the smell gets around.
Recipe I used
1000g / 2.2lb of Courgettes/Zuccchin sliced.
950ml / 4 cups water
750ml / 3 cups vinegar
8 sprigs Dill
3 cloves of garlic
2 garden onions
1/2 tsp mustard seeds
125g salt
Method
Slice courgettes and sprinkle with salt. Cover with cold water or water with ice. Leave for one hour drain and dry.
Wash jars and lids with hot soapy water. Put the jars on a tray and heat in the oven. Put the lids in a pot and boil till ready to use them.
Put a tea towel in the bottom of a large stock pot, fill to required level and bring to the boil ( an inch lower than the lid of the jar )
Mix water, sugar and vinegar stir until sugar has dissolved using a wooden utensil. Boil for two minutes. Then add garlic, onions and mustard seeds. Boil for another minute and remove from the heat.
Carefully remove jars from the oven. Place on a towel or on a heat resistant surface. I let them cool just a little before adding the courgettes I was afraid the temperature difference would crack the jars.
Fill with your courgettes and sprigs of dill.
Carefully fill your jars.
Stir with a wooden utensil.
Wipe the tops.
Apply lids. Not too tight.
Carefully put into stock pot with boiling water.
Keep an eye on the time. 8 minutes for crunchy pickles and longer for soft ones.
Place a folded bath towel on the counter.
Remove from the water and turn upside down, leave over night.
Check your lids , If the cannot be pushed down give yourself a high five it worked!
If you can still push it down it hasn’t worked but fear not, just reprocess within 24 hours of original process and it will be fine. The contents will just be a little softer.
leave to cure for a couple of weeks
then…..
pop it and ENJOY
Thank you for taking the time to read this far. If you try this recipe please do let me know how you get on I would Love to know.
Also if I have made any mistakes or should have done something differently don’t hesitate to let me know. I’m only learning so any feedback is massively appreciated.
I thought it was apt so I’ve decided to give it a try. I hope I’m doing this correctly regarding tagging the page etc . I may take some more creative pics tomorrow but as its 8.45 pm and getting dark here Ill just use what I have at hand for now.
now what do I choose …..
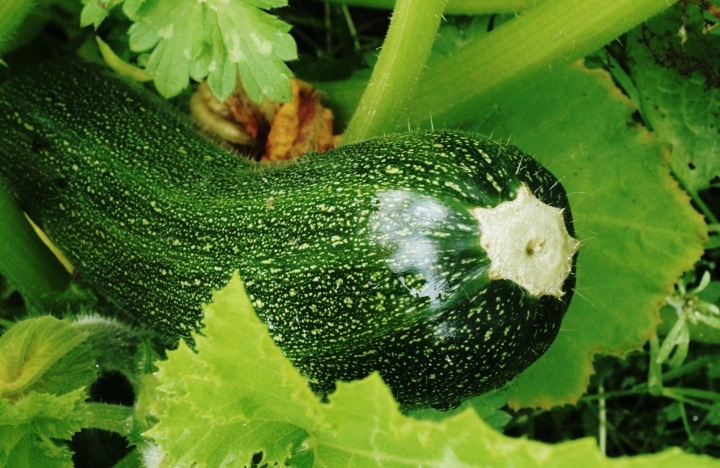
beautiful fresh courgette
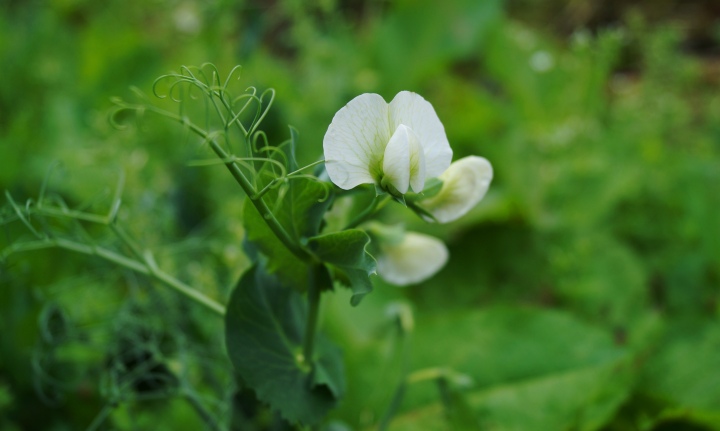
Pretty pea blossom
I hope these Images are suitable. Just a bit of fun. I cant decide which I prefer so here’s both. I love the brightness and vibrancy of the courgette/zucchini but I also love the delicate flower and feelers of the pea.
Hope you’ve enjoyed this short photo blog.
Follow me for my next installment. I’m going to try pickling as I’m inundated with courgettes. It’ll be interesting to see how it goes………
Where do I start. Right ok the back story. Original I only planted one line of peas along the veggie garden boundary fence. A following three weeks later I planted three more plots in different areas of the garden. One plot produced nothing except weeds! but the other 2 were good.
Ok so back to plot number one. Every day I checked them, talked to them, nurtured them and gently trained them towards the fence. Eventually they made it. They were growing, the pods were swelling and almost ready but… Tragedy struck!!!!!
Meet Tragedy!
Look sweet and innocent don’t they. Apparently the small fence keeping them away was too small. It was knocked down and the two girls started to munch, and munch and munch! they ate EVERYTHING. devastated! was an understatement.
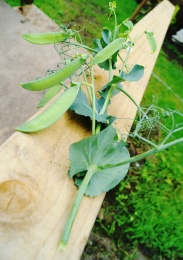
The other two plots continued to grow, blossomed and beautiful crisp pods could soon be seen. One batch was weeded but because the peas wrapped themselves around the dam weeds I ended up breaking two plants. Weeding was out the window and I was two plants down. Being lazy I didn’t bother staking them. The plants were quite close together and were holding each other up. I assumed everything was fine. It wasn’t. One night was crazy windy.All my delicate plants were knocked over. I know the pics are rubbish. The peas are the dark ones……
Before
After
Finally my laziness had caught up on me. My job for today was staking peas. YAY!.Off I went to collect some fallen branches from nearby ash trees. Having collected more than enough I got to work. Pushed my natural stakes into the ground, gently lifted the plants, and pulled them over to ”grab on”. I only had one casualty. Apart from that its been a success so fingers crossed they wrap themselves around the branches and we have no more wind. In another week or so I should have some peas to get popping.
The one Casualty
Thanks as always for reading, I hope you’ve enjoyed my blog and my pictures from today. It turns out peas are quite difficult to photograph but you get the general idea. I just love the blossoms and the curly feelers they have.
So many Courgettes. I wont say they are taking over but there are just so many. I have maybe nine or ten plants. Far too many for one family. I didn’t realise what a success they would be.Two plants would have been plenty. Today alone I harvested over ten beautiful fruits.
I need a bigger bucket!
So so many courgettes
I enjoy cooking, had some time to kill, a bucket of beautiful courgettes and the world wide web at my finger tips. I searched for any soup recipes containing Courgette, or Zucchini as you guys across the pond call it. I Found a recipe for carrot and courgette soup on pennysrecipes.com and got cracking.
Ingredients
2 tsp olive oil ( I prefer butter so used it instead )
1 onion diced
3 medium courgettes sliced
3 medium carrots chopped
1 tsp mixed herbs
700ml vegetable stock
2 tbsp tomato puree ( I used a good splash of tinned tomato )
1 bay leaf ( I added this too )
Soup ingredients
Method
Heat pan and fry onions till soft
Add in carrots fry for few minutes
Add in courgettes when they start to soften,
Add in stock, mixed herbs, bay leaf and tinned tomatoes.
simmer till cooked.
blend
ENJOY
I prefer soup smooth but if a chunky soup is desired remove some of the vegetables. Blend remaining till smooth return the rest heat and enjoy. swirl of cream is optional but if you have it its worth it. This soup is beautifully light and tasty, you gotta make it.
Next time I think ill add some fresh ginger for some zing and some coriander too. Hope some of you guys try this recipe its delicious. I’d LOVE to see some of your creations !
Just a quick hello and introduction. I’m Christina from the middle of Ireland I get crazy ideas, this is one of them. In May this year I decided I wanted a vegetable garden, Not realising fully how much work was involved. Weeding, it’s beyond endless!!!.
With the help of my other half we cleared a patch of ground ploughed, planned and made drills in our soon to be garden. We bought our seeds and got planting. Waiting was boring but eventually the first fresh green seedlings popped through the soil, soon my garden was bright green and alive.
Please hang in there with me. I’m pretty new to all this gardening so my terminology won’t always be correct, and I undoubtedly do things wrong but you’ll get the idea. Eventually I’d like to be pretty much self-sufficient in the vegetable department,well fingers crossed anyway.
Follow me on my crazy vegetable journey. As well as posting my progress I’ll be posting some memorable moments from the past. Such as my two pet calves feasting on my peas or when my first courgette grew big enough to harvest (excitement overload ). Both stories are for another day…..


 next up was preparing a Large stock pot by putting a tea towel in the bottom filling with water and Bringing to the boil. The towel is to prevent the jars from cracking by hitting off the bottom.
")
")
")

")

")
")
")
")
")
")


")